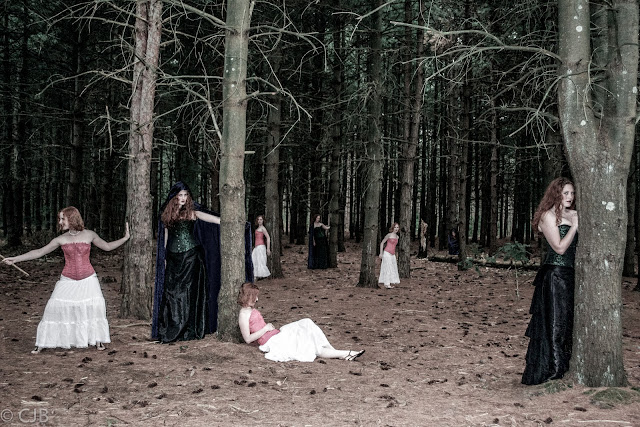
In my last post I included a photo where my two ladies were in multiple places at once.
I decided a while ago I wanted to try photo manipulation. I threw the term into youtube and surfed through until I found a video on how to make yourself appear in multiple places at once. I decided that I wanted to try that at some point.
While out in the woods with my lovely models, Jill and Maggie, we came to a clearing with lots of trees and I thought that would make for an awesome picture, and an awesome chance to try out the multiple shot!
I took 12 photos to start off with. 1 of just the woods and 5 of each lady. And one extra of Jill because she wasn't sure what to do with her stick! The untouched photos are below.
I loaded all the photos into Pixelmator (my photoshop mac knockoff) and copy pasted them as separate layers in one photo. Only the top layer showed, of course.
 |
| Just the woods |
 |
| This great dramatic pose by Maggie ends up covering up a cute one of Jill. |
 |
| I had to move this one of Maggie crouching to behind the fallen log because she covers herself up with a dramatic pose. |
 |
| This one gets lost in the myriad of photos around that middle tree. |
 |
| Maggie ends up covering up herself, obfuscating her crouching pose. |
 |
| This photo of Jill got covered up by Maggie's dramatic pose. |
 |
| I had to move Jill later on because she was blocking 3 shots here, but I loved the lost and confused look! |
 |
| I decided that I liked the sword fight below better, so I got rid of this one! |
 |
| Next time I want to avoid poses going off screen, this would be great more in the center, or with her facing the camera. |
To make each layer show up I had to start cutting. I used the lasso tool for this. I made sure the woods by themselves were my bottom layer, the order of the other photos didn't really matter yet, just that one. I selected each layer and cut out the background leaving just Maggie or Jill. As I did each layer they all gradually began showing up.
Below you can see the 5 layers of Jill and the 5 layers of Maggie.
 |
| 5 Jills, oh my! |
 |
| 5 Maggies peeking through the trees! |
When I put the Jill and Maggie layers all together I discovered that there were a couple instances where they were covering each other up, or covering themselves up.
 |
| The original 8 shots that I sent to Lightroom |
For example, in the Maggie picture above there were three problem shots. The one of Maggie on the left with her hood up covered up the one of Jill standing in the same trees with the cape on. This made me sad, I had to decide which to feature... though now that I am typing this and thinking about it I wonder if I could have repositioned Jill to be see poking around Maggie...
OK I just HAD to stop mid-blog to see if I could reposition so that all 5 photos can be seen. I originally moved 2 figures to make 4 of each be seen, now I have moved a few more and all of the photos can be seen.
So moving figures around is a bit touchy. Not only do you need to move them and trim right up to the edges of the figure so the background blends, you also have to resize them to make sure they are the right size for the perspective, and adjust the coloring because they have more light near the front of the image and less near the back of the image. Total noob that I am... I don't think I did the best job at that, but it is passable at least!!
 |
| I got to thinking, can I move even more figures to get all 10 in? Yes, yes I can. |
Once all the photos were added and moved around I saved the file and moved over to Lightroom to retouch the colors.
In Lightroom I played around with some features. First I enhanced the colors, adjusted the highlights, shadows, the white, and the black. I enhanced the green and orange to make the colors pop more. Then I decided that I wanted to make it look more fantasy and creepy, so I brought down the vibrance of the photo.

This was my end product! I am pretty happy with it, I think it looks pretty good for my first ever try!
Here is my end product with the 10 shots!
I hope this was helpful for anyone interested in trying the multi-shot photo thing!
If you try it out let me know, send me a link!


